Showing posts with label Home organization. Show all posts

Saturday, August 28, 2010

How to have your ideas...and save on ink too


You could say I have always been addicted to ideas. When I was first married I used to get crafty library books and spend a lot of time copying page after page. Luckily I worked at a copy shop. That was before blogs! (or at least before I knew about blogs)

It has been dangerous for me to know about blogs. I have limit myself. But I can't give up my ideas. I love getting new ideas (Recently, I discovered why. My friend does personality profiling on how to dress, and I have discovered that I am a "1" and "1's" love new ideas!)

So, I was spending a lot of money on ink and paper. I know I could bookmark them, or save them to my computer. But I would much rather look through prinouts that on the screen to choose my next project. Plus, I thought I would save them to my computer and forget all about them.
I rationalized my ink spending habits on the fact that I am pretty low-maintenance. Most of my clothes comes from clearance racks, I don't eat out a lot, I don't get pedi's, etc. Besides, SAHM's need some sort of "out" and this was mine.
But, it was getting a little excessive. I have stacks and stacks of printouts. All great ideas, but I was probably only getting to 1% of them. Soo, recently I started "starring" them on google reader. Then every once in awhile, I will copy the picture, paste it into word, then print the web address under the picture. I will also copy and print recipes this way.
Then, when I do look through my ideas, and get serious about one, I can look up where I can find more detail. I also use grayscale to save on expensive colored ink. Then I have my little filing cabinet divided into categories. It's been working great for me.

Do you have any great organizing ideas for your projects to be?


Friday, July 2, 2010

How to get dry-erase off of stubborn boards

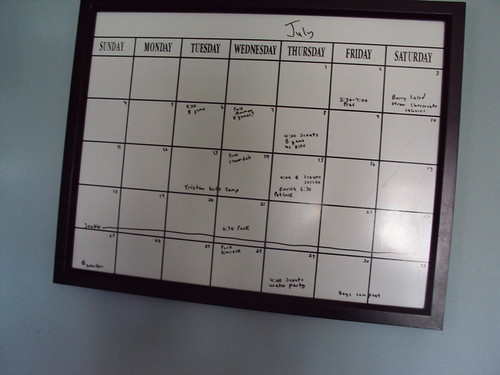
I love the Internet. Can you imagine how life would be without it? Last month I scored a good deal on a big dry-erase calender that hangs by the garage door. It is my brain. Everything, including the menu goes on here.
DSC06183
Today I went to erase it to start July, and the writing would not come off. I tried all sorts of soaps, cleaners, even vinegar. Nothing was working. Not even my Internet. But when it started working again, two clicks had my answer! And even better, I actually owned both items:
DSC06184
Spot Shot Carpet Cleaner
and a Magic Eraser (which I tried by itself earlier and it didn't really work).
But put them together and you have magic. Just spray with the Spot Shot and let sit for about 3-5 minutes. Then get your magic eraser damp and wipe away. Just like magic. Love it!

Monday, January 18, 2010

Solving the cup issue....

I don't know if your house is like mine or not, but this what my counter ends up looking like at the end of the day. Making me seriously envy my sister-in-laws drinking fountain she has in her HOUSE! Jealous.

Anyway, I've been trying to think for a while how to solve this. I even contemplated buying those expensive name cups at Toys R Us. But I would have to special order two names because they aren't common. Anyway, I saw this idea and knew I had my solution. I even had Staz-On but I had never used it. So, I picked up these plastic tumblers fairly cheaply at the big store that starts with W. And I stamped the names for each of my kids on three cups each. They get one cup a day. And the know which one is theirs. I threw the rest of the gross cups away. Yeah. #1 on my project list complete.

And yes, I did wash the cups and the ink really does stay on! (Hence the name)
Nice new, clean, personalized cups!


Thursday, January 14, 2010

Weekly Menu

My friend Tina comes up with a word or phrase of the year instead of writing down New Years resolutions. I didn't really do any resolutions this year, but if I had to pick a word for me it would be: FOCUS

I have good intentions to be organized, but sometimes I'm an all-or-nothing kind of gal. My hubbie can tell you about all of the elaborate menu systems and chore chart systems I have spent hours preparing only to abandon them after one week or less.

And sometimes I have good intentions to start something, but don't because I want to wait until it's perfect. Like my latest menu system was to write down all of the dinners we eat on a seperate card, and then pick from the cards for the weekly menu. But, then I get distracted and didn't finish writing down the meals and gave up.

So for me. Simpler is better. There is nothing wrong with a ripped out piece of paper from a notebook tacked to my fridge. It will still get meals made even though it is not in a fancy decorated box.

So, anyway, I made a menu for this week and next (I know the week is almost over). I love reading the weekly menu over at Sister Stuff and you have to check out This Week for Dinner. Not only do they post weekly menus and then people can add their own, they also post recipes and cooking tips.

Anyway, I analyzed all of the freezer meals I still have in my freezer from my freezer group and decided I better get those eaten.

So, here is my menu:
Wed: Brinner: French Toast and Cheesy Eggs
Thurs: Sloppy Joes
Fri: Honey Ribs from Freezer Group
Sat: Pizza Calzones
Sun: Crock Pot Italian Chicken
Mon: Mu Shu Chicken
Tues: Mexican Chicken and Rice Dinner
Wed: Tortilla Soup
Thurs: Sausage Pasta Dish
Fri-Papa Murphys
Sat-Hopefully date with my hubbie!


Saturday, January 2, 2010

Bakugan and Bakugan Card Holder Tutorial

If you have a house full of little boys (or some girls) you probably have Bakugans laying around your house. We do. And I never really have a place to put the weird little things. So, I came up with this:

I'm going to attempt to do a tutorial. It did give me a newfound respect for people who make easy to understand, detailed tutorials. I will do my best.

The final product will hold 24 Bakugans (2 in each pocket) and several cards

Supplies:

Heavy fabric (I used canvas) cut to 25 inches high x 18 wide (you might have to trim some off the bottom at the end)
Single fold bias tape (or make your own like I did-learn how here)
Fabric for pockets (I used a sheet remnant I had from making curtains years ago. It was nice to have one long piece of material, but not necessary)
Large Eyelets or grommets
Ribbon
Mounting Hook with command strips
Fabric paint (or acrylic paint and textile medium)
1) Cut your heavy fabric to 25x18 wide
2) Cut a long piece of fabric 4 inches tall by 48 inches long.
3) Fold over 1/2 inch piece 0f fabric from the top and iron it down.
4) Sew along the folded edge.
5) Cut this long strip into 4 inch lengths. ** If you don't have a long strip of fabric you can do steps 2-5 individually. It just saves some time to do it all at once. 6) Snip both corners of the bottom on each piece of fabric. Use the same corner as a guide so you can get equal corners.7) Fold each side (Except the top) over a half inch and iron each side. Repeat for all pockets.
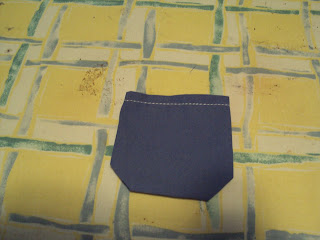

8) Arrange and pin your pockets onto your canvas.

9) I bought a twin needle when I first got my sewing machine and haven't used it yet. I thought this would be a fun place to try it out so the pockets would look more authentic.
Sew around each pocket (leaving the top open). Read your manual to find out how to thread your twin needle. This is what the top of my machine looked like.
10) For the card pockets on the bottom do the same thing as the Bakugan pockets. Except cut the fabric to about 4 3/4 tall by 4 1/2 wide. And I made these plain rectangles without the snipped corners. You don't have to the extra space between the top pockets and the bottom pockets like me. Don't ask!

11) Cut any extra fabric off of the canvas.
12) Sew your bias tape into place around the edges.
13) For the BAKUGAN on top, I used the freezer paper stencil method found here. Only I found the coolest stuff you need to have in your supplies. It's called textile medium and it turns any acrylic paint into fabric paint (which is pricier than acrylic paint).
I found the logo online and copied it on my computer. Then in Photoshop I sized it to the size I wanted and printed it out for my outline on my stencil. I did a post earlier about using a Crystal Light canister. The little tubs can also be useful for things like mixing small paint projects.And plastic baby food jars can come in handy when storing the paint for the next coat.

14) Set your eyelets or grommets on the top. I used my Big Bite, but you can buy grommet setters at the fabric store if you don't have one. Then tie some ribbon through the holes. I hung it on the Command strips mounting hooks in my boys room.

Now, the Bakugans can be kept in one place. And I won't feel so guilty about my next 50 projects being for my daughter. If you make one of these, leave a link so I check it out. This could be adapted for any little toy like Polly Pockets etc.

Tuesday, December 1, 2009

Hat and glove organization

Now that winter is upon us,I thought I would share this trick I learned from my sister-in-law. We used to have a basket of gloves and hats in the coat closet. And of course, it would get dumped out and then abandoned every time a child looked for a matching set of gloves.

So, this is perfect solution. It's an over-the-door shoe hanger. And each compartment can hold a pair of gloves, a hat, scarf etc. Now if only the munchkins would put their gloves back without being asked.