
I have good intentions to be organized, but sometimes I'm an all-or-nothing kind of gal. My hubbie can tell you about all of the elaborate menu systems and chore chart systems I have spent hours preparing only to abandon them after one week or less.
And sometimes I have good intentions to start something, but don't because I want to wait until it's perfect. Like my latest menu system was to write down all of the dinners we eat on a seperate card, and then pick from the cards for the weekly menu. But, then I get distracted and didn't finish writing down the meals and gave up.
So for me. Simpler is better. There is nothing wrong with a ripped out piece of paper from a notebook tacked to my fridge. It will still get meals made even though it is not in a fancy decorated box.
So, anyway, I made a menu for this week and next (I know the week is almost over). I love reading the weekly menu over at Sister Stuff and you have to check out This Week for Dinner. Not only do they post weekly menus and then people can add their own, they also post recipes and cooking tips.
Anyway, I analyzed all of the freezer meals I still have in my freezer from my freezer group and decided I better get those eaten.
So, here is my menu:
Wed: Brinner: French Toast and Cheesy Eggs
Thurs: Sloppy Joes
Fri: Honey Ribs from Freezer Group
Sat: Pizza Calzones
Sun: Crock Pot Italian Chicken
Mon: Mu Shu Chicken
Tues: Mexican Chicken and Rice Dinner
Wed: Tortilla Soup
Thurs: Sausage Pasta Dish
Fri-Papa Murphys
Sat-Hopefully date with my hubbie!


 2) This I-Top Brad Maker. So cool! You can make your own brads out of paper, fabric or even photos. Online they are saling for $30, but maybe a Roberts or Michaels coupon would work.
 3) Pinking Shears. I have lots or projects that I could these for. Including a cute little Valentine banner.
 4) Wii Fit: Not for any good reason besides I think it looks fun, and maybe I would work out a little more often.
 5) Candy thermometer: I tried to make homemade marshmellows over Christmas and had to guess on the temperature. They failed miserably. I will blame it on not having a thermometer.
 With matching

 4) Sew along the folded edge.
 5) Cut this long strip into 4 inch lengths. ** If you don't have a long strip of fabric you can do steps 2-5 individually. It just saves some time to do it all at once.
 6) Snip both corners of the bottom on each piece of fabric. Use the same corner as a guide so you can get equal corners.
 7) Fold each side (Except the top) over a half inch and iron each side. Repeat for all pockets.
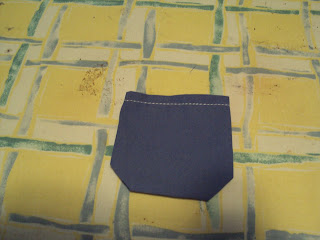


 10) For the card pockets on the bottom do the same thing as the Bakugan pockets. Except cut the fabric to about 4 3/4 tall by 4 1/2 wide. And I made these plain rectangles without the snipped corners. You don't have to the extra space between the top pockets and the bottom pockets like me. Don't ask!
 13) For the BAKUGAN on top, I used the freezer paper stencil method found
 And plastic baby food jars can come in handy when storing the paint for the next coat.









 Posts
Posts

